
Fast read
If your Fronius GEN24 inverter appears offline in the Solar.web app, it may have lost its connection to your home Wi-Fi network. You can reconnect it by activating the inverter’s Wi-Fi access point, connecting to the device and entering your home network details in the inverter settings. Once connected, monitoring data usually returns within about 20 minutes.
Why Does a Fronius GEN24 Inverter Lose Internet Connection?
A Fronius GEN24 inverter can occasionally lose its connection to the internet, which prevents solar production data from appearing in the Solar.web monitoring app. This issue is usually not related to the solar system itself but rather to changes in the home network.
Common causes include changing internet providers, updating the Wi-Fi password or temporarily losing router connectivity. When this happens, the inverter continues generating electricity normally, but it stops reporting data online.
Reconnecting the inverter to your home Wi-Fi network usually restores monitoring within a few minutes.
How Do You Activate the Inverter’s Wi-Fi Access Point?
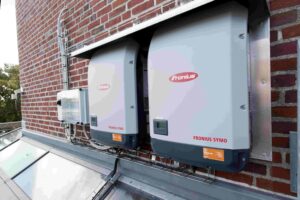
The Fronius GEN24 inverter has its own built-in Wi-Fi signal that allows you to connect directly to the device during setup.
To activate this access point, go to the inverter and tap the touch-sensitive area on the front panel. The Wi-Fi indicator light should begin flashing blue, which indicates that the inverter’s wireless network is active.
Once the access point is active, your phone, tablet or laptop can connect directly to the inverter’s temporary Wi-Fi network for configuration.
How Do You Connect the Inverter to Your Home Wi-Fi?
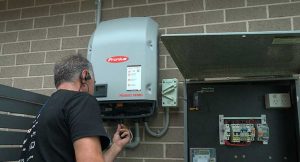
After connecting your device to the inverter’s Wi-Fi network, you can access the inverter’s configuration page through a web browser.
The typical connection process involves:
1. Connecting to the Wi-Fi network that begins with “FRONIUS_”
2. Opening a browser and entering the inverter address 192.168.250.181
3. Logging into the configuration interface
4. Navigating to Communication and then Network settings
5. Selecting your home Wi-Fi network and entering the password
Once the correct network details are saved, the inverter will attempt to connect to your home internet connection.
How Do You Confirm the Connection Was Successful?
When the connection is successful, the Wi-Fi indicator on the inverter will normally change from flashing blue to a solid blue light. This indicates that the inverter is connected to the internet and ready to transmit data.
After reconnecting the inverter, it may take around 15 to 20 minutes for solar production data to begin appearing again in the Solar.web app or monitoring portal.
If the connection does not work immediately, common issues include incorrect Wi-Fi passwords or weak signal strength between the inverter and the router. In some cases, installing a Wi-Fi extender closer to the inverter can improve connectivity.