
Fast read
If your Sungrow inverter appears offline in the iSolarCloud app, it usually means the inverter has lost its Wi-Fi connection. By activating the inverter’s hotspot, connecting through the iSolarCloud app and entering your home network details, you can restore monitoring. Once connected, system data typically begins updating again within 15 to 30 minutes.
Why Does a Sungrow Inverter Go Offline?
It is common for a Sungrow inverter to appear “offline” in the monitoring app after changes to the home internet network. This often happens when the household changes internet providers, updates the Wi-Fi password or installs a new modem.
When the connection is lost, the solar system continues producing electricity normally. The only thing affected is the monitoring service, which can no longer send system data to the iSolarCloud platform.
Reconnecting the inverter to the home Wi-Fi network usually restores monitoring within a short period of time.
What Do You Need Before Reconnecting the Inverter?
Before starting the setup process, it helps to have a few things ready. The first is the iSolarCloud app installed on your phone, which is the monitoring platform used for Sungrow systems.
You will also need your home Wi-Fi password and access to the inverter location so you can activate its wireless connection mode. Standing close to the inverter ensures your phone can connect directly to it during setup.
It is also important to confirm that your home Wi-Fi signal reaches the inverter location. Sungrow inverters often connect best to a 2.4 GHz Wi-Fi network rather than a 5 GHz network.

How Do You Connect Your Phone to the Sungrow Inverter?
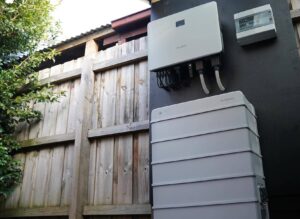
To begin the setup process, the inverter must first be placed into pairing mode. This is done by pressing the button on the Wi-Fi dongle at the bottom of the inverter several times quickly.
Once the inverter hotspot is active, the connection process can be completed through the iSolarCloud app:
1. Open the iSolarCloud app and log in
2. Select Support and then Local Access
3. Scan the QR code on the Wi-Fi dongle
4. Join the inverter network that begins with “SG-”
At this stage, your phone is connected directly to the inverter rather than your home internet.
How Do You Connect the Inverter to Your Home Wi-Fi?
After connecting your phone to the inverter, the app allows access to the inverter’s local settings. From here you can enter your home network details so the inverter can connect to the internet.
Within the configuration menu, select WLAN configuration and choose your home Wi-Fi network from the list. Enter your Wi-Fi password carefully and confirm the connection.
Once successful, the inverter will disconnect from the phone and attempt to connect to your home network. A solid blue indicator light on the Wi-Fi dongle usually confirms that the connection is working.