
Fast read
A Sigenergy battery installation begins with a site check, followed by modular stacking of the battery system, licensed electrical connection to your switchboard and final commissioning through Wi-Fi setup. Depending on switchboard condition and cable complexity, installation may take half a day to a full day.
Site Check and Preparation
Installation day begins with a site check and preparation. The installation team will conduct a final walkthrough with you to confirm the battery location, which is typically in a garage or mounted on a sturdy external wall close to the switchboard. They will ensure the area is safe, accessible and suitable for installation.
Before they arrive, it helps to clear the workspace of vehicles, storage boxes or obstacles and ensure easy access to the switchboard. This is also the ideal time to ask any final questions before work begins.
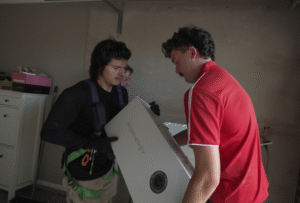
Mounting and Stacking the Battery System
The Sigenergy system is modular, meaning it is assembled in stacked components rather than installed as one large unit. The installers begin by securing a level base plate to the wall or floor to ensure the battery modules align correctly.
The individual battery modules are then stacked onto the base, followed by the installation of the SigenStor power controller, which acts as the system’s control centre. Because the modules connect directly to each other, the design reduces external wiring and creates a cleaner, more streamlined installation compared to many traditional battery systems.
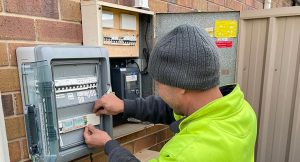
Electrical Connection to the Switchboard
The electrical stage is the most critical part of the process and must be completed by licensed electricians. New, properly sized cabling is run from your main switchboard to the battery location. Protective circuit breakers are installed within the switchboard to ensure the system operates safely.
In many homes, particularly older properties, the existing switchboard may require upgrades to safely accommodate the new battery hardware. This is common and ensures compliance with electrical standards and long-term system reliability.
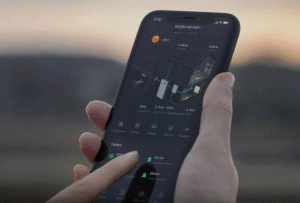
Commissioning and System Setup
Once all wiring is complete, the installers power up the system and begin commissioning. This involves connecting the battery to your home’s Wi-Fi network so it can communicate with monitoring platforms and receive software updates.
Using a dedicated installer app, the technician configures the system to recognise your solar panels, grid connection and battery settings. A full system check is performed to confirm all components are operating correctly and communicating as intended.
After installation, you should receive a proper handover. The installer should demonstrate the monitoring app, explain how to view solar production, battery charge levels and home consumption, and show you the correct shutdown procedure in case you ever need it.
