Fast read
Installing a solar panel system involves several steps, including setting up scaffolding for rooftop access, arriving early to avoid the midday heat, bringing all necessary equipment, including panels, an inverter solution, racking, switches, and cabling, working on the roof and switchboard, installing the panels, inverter, and racking, running cables through wall and roof cavities, installing a switchboard, and completing a final inspection and commissioning.
To ensure a smooth solar installation process, it is essential to use a reputable, quality-focused solar installation company and provide enough parking space for the installation team. It is also advisable to have spare roof tiles on hand, especially if the roof is older, and to ensure the installation is fully waterproof.
The key steps of installing your solar panel system
Some quality-focused good solar installation companies will sit down with you and take their time and go through all the steps to install your solar panel system. However, some disregard these details, leaving you to wonder about the duration and tasks involved.
Installation process
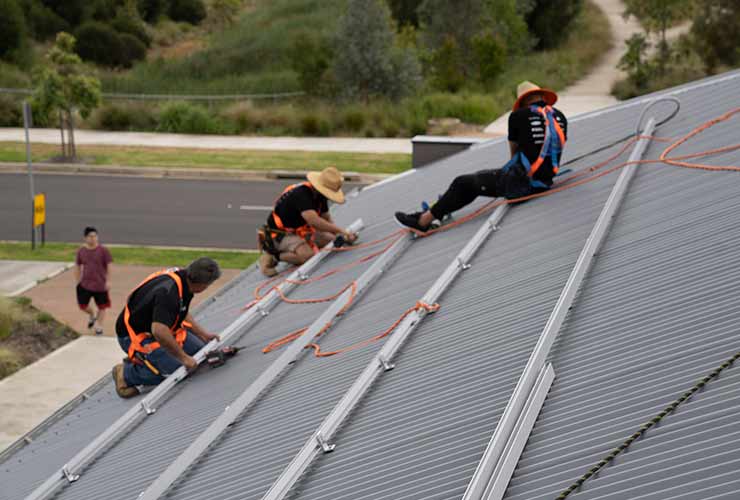
1. Set up scaffolding for rooftop access
If you have a two-storey roof, edge protection will be required to ensure site safety. Also, some installers decide to add scaffolding to improve roof access. However, scaffolding is not always essential if your home has one storey, especially a low-angle roof.
2. Company arrives as early as 6 am in the summer
To avoid the midday heat, which will make working in a roof cavity exceedingly uncomfortable. The goal is to complete the roof panels and the cavity work before the heat strikes.
Installers are using scaffolding or scissor lifts to place solar panels on second-story roofs. This is done to ensure safety and efficiency. These tools allow for quick and safe installation of the panels. Installers also have to wear the appropriate harnesses to protect themselves when working on anything other than a completely flat one-storey roof.
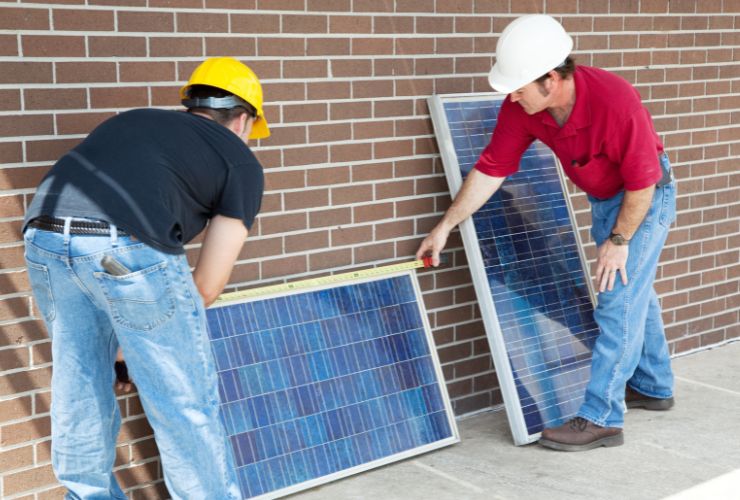
3. Your installer will bring all the items, such as the panels, solar inverter, racking, switches, and cabling
They need to have somewhere where they can unload the gear, so you must allow some parking space for the installation team where they can unload their equipment and keep the vans. Sometimes on very busy roads, you might have to put traffic cones up to allow the installer to go back and forth to their van safely.
4. When the crew arrives
Nowadays, many installation companies will send a crew that will split up, and one part of the team focuses on the roof, rail, and solar panels, and one staff member works on the switchboard and the inverter. If you have decided to go for a string inverter.
If you have chosen microinverters or optimisers, then these will also see the crew working on the roof involved in the installation. Be prepared for some noise because of drilling and grinding. Having a few spare tiles at hand is advisable if you have older roof tiles because some brittle roof tiles could crack as the crew works in that space. In their site inspection, some installers check in detail the conditions of your roof tiles and even come along with spares, but this is not always the case.
In regional areas with smaller install teams, the installer usually undertakes the solar panel and inverter steps one by one. They will likely start with the solar panels to avoid the midday heat.
For a flat or metal roof, the racking will require different brackets compared to a tile roof. Tiles need to have a groove ground into them to guarantee a fully waterproof installation. This extra work is one of the many essential steps that cheap solar companies avoid, and your soggy roof and mouldy ceiling in years to come will result from this initial saving.
By now, you should understand where the solar panels will sit. This should be far from the gutter and the top ridge for wind load and draining purposes.
5. When it comes to the cabling, some installers prefer to make this their priority
It is always preferable to install the cabling in wall and roof cavities to avoid the running of outside conduits. Unfortunately, this is not always possible. Again cheap solar will show no care for the long-term look of your house, and these companies will provide a conduit and cabling solution that suits their rushed timeline and will not focus on the visual appeal of your home.
6. After the racking has been installed on the roof
The solar panels will be positioned and clamped down with special solar mid and end clamps. The older solar panels around 2005 used to be as light as 13 to 15 kilos, and one installer could easily carry them onto the roof.
As solar panel sizes have increased every few years, we are now looking at 22 kilograms minimum and a much more extensive physical size. Getting them on the roof is now quite difficult for a single operator. So expect two people to get the solar panels on the roof and clamp them in.
7. The next step is to connect the solar panels to the inverter via the cabling
The cabling goes from the panels to their inverter solution and then from the inverter solution to your switchboard. The DC output of the panels is connected directly to the inverter. The inverter solution transforms the DC electricity into AC electricity, which will, in the future, be utilised by your home’s electrical equipment or exported to the grid.
8. Connect the system to the switchboard and the meter afterwards
Depending on what monitor solution you have chosen, maybe something like solar analytics, then there has to be additional work on the switchboard undertaken to fit the monitoring hardware so that you can have your data readily available via your phone or computer. This will allow you to monitor your output, system performance, and savings accurately.
It also depends on the different states and regions as to what’s happening to the meter work. In some states like NSW, the installer can change the meter over if he has the correct qualification; the energy company will send a separate team to undertake this work in other regions.
Before signing the final quote, ensure you ascertain who is responsible for connecting the system to the electricity grid and who will handle the meter work. You don’t want to be chasing the connection and experiencing delays in accessing your solar benefits.
9. Final inspection
Before commissioning the solar power system, the installer must complete a final electrical safety and performance inspection, and then there is the system handover. This involves explaining various safety switches and handing over manuals to you. The warranty documents should be part of this pack as well as the serial numbers of the panels which are on your roof.
The reason I always suggest asking for the inverter and panel serial numbers is that in a couple of years, if there is something wrong with the solar PV system, by having the model and serial number, the manufacturer can easily check if this batch of panels was prone to a particular issue, like water ingress or delamination.
It’s crucial to have a proper handover, maybe even receiving assistance in installing monitoring apps on your phone and computer.